Fusible tapes should not be dismissed when mentioned in a pattern. In fact, they are merely strips of interlining, precut for your convenience, but are essential to stabilize seams. If you don't have any fusible tape in hand, don't worry! They are easy to make using a piece of interlining. So, let's see how we do this ourselves... no fuss!
**Fusible interlining can be somewhat slippery and hard to manipulate, especially when it's cut in the bias. For that matter, we will use, in the following technique, silk paper as a stabilizer. Note that silk paper can be very practical when working with other types of fabrics such as silk, chiffon or linings. Feel free to use the same technique when making bias strips with these fabrics too!**
Be sure to use the interlining matching with the fabric where it will be applied on. The thicker the fabric is, the thicker the interlining will be, and vice versa! If you are using a knit or any other stretch fabric, ensure to use a knitted interlining.
Be sure to use the interlining matching with the fabric where it will be applied on. The thicker the fabric is, the thicker the interlining will be, and vice versa! If you are using a knit or any other stretch fabric, ensure to use a knitted interlining.
Tools
- Silk paper
- Interlining
- Square ruler
- Tailor's chalk
- Pins
- Seam gauge
- Fabric shears
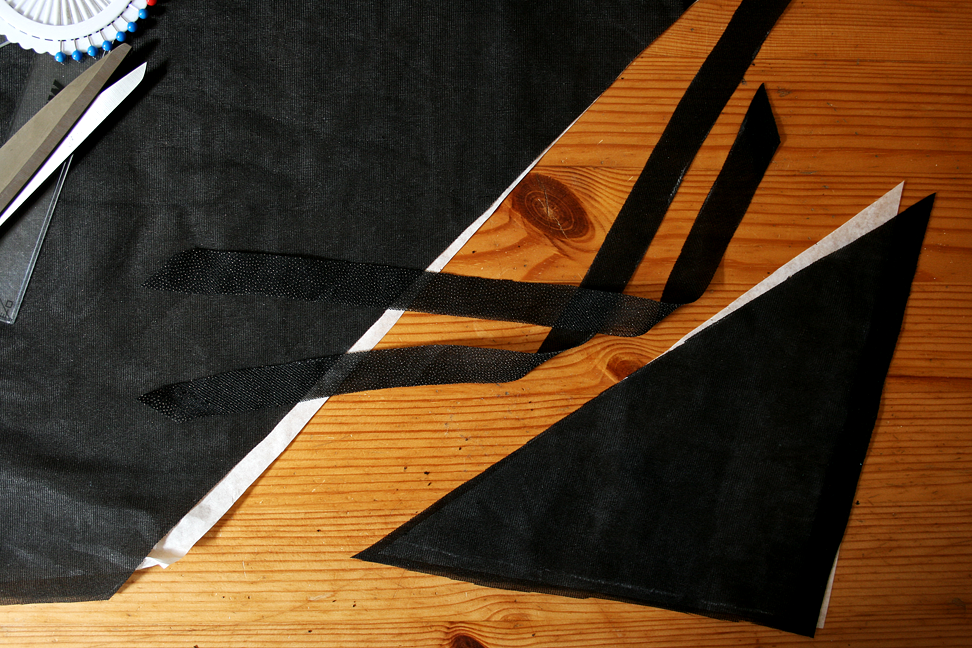
How to cut
1- Place the silk paper on a cutting surface and the interlining on top of it. Set the sticky side against the silk paper as it is much easier to trace over the soft side of interlining.

2- Place the square ruler against the interlining selvedge and trace along the square ruler slanted edge, using the tailor's chalk. **If you don't have a square ruler, measure and mark two equal lengths along the selvedge and the weft and join these two markings with a straight line of chalk.**

3- Soon after the first line traced, pin it along to the silk paper at tight intervals (ideally, choose a pin with no ball point). Doing so will give extra stability when tracing the other lines. Then, chalk a parallel line according to the required tape width. You can use a seam gauge, but any ruler will do. Again, pin along this line and repeat the step, as needed, and feel free to chalk more lines toward the corner, as fusible tape can be applied in small areas too.

4- Once you have enough lengths, take your fabric shears and start to cut along the line of the shortest length. Carefully remove the pins as you reach them. Lift and manipulate the fabric as needed - the pins are holding everything together!

5- Cut through the remaining lines, discard the silk paper and voila...you now have fusible tape ready to be used!

Why in bias?
If you wonder why the fusible tape must be cut in the bias... take a look at the picture below. The top strip was cut in the bias and the lower one along the weft. You'll notice that the top one curves flowingly and the lower one doesn't. Fusible tapes are often applied in armholes and pocket openings so it is very important that the tape follows along the curve.

No comments:
Post a Comment